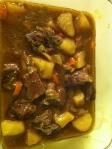
This is the time of year when everything feels a little colder, and with the holidays among us, we start to think of home. Warm homestyle dishes that mom and grandma used to make from recipes that were handed down through generations are definitely in order. For this beef stew, instead of purchasing the “stew meat” chunks that are sold in stores for up to $5 a pound, I bought a full chuck beef roast for just $2.57/lb and cut it up myself.  Now, I know that even at this price it’s a little costly, but you do get quite a few servings out of this, and can freeze it for later, or pack it as a lunch to save on eating out. And, this way, you are getting the exact same meat for 40% cheaper, so you can double your recipe for the same price, or, if you are like me, make it for HALF the price!!
*NOTE: You can convert this recipe to a slow cooker recipe. Make sure you brown your meat before you add it to your cooker, and everything else will slow cook all day.*
TOTAL COST for 10 (2 cup) servings: $8.50
Ingredients
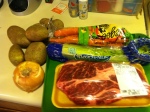
- 2 1/2 lbs Boneless Beef Chuck Roast
- 6 medium potatoes
- 6 fresh carrot
- 8 stalks celery
- 1 large onion
- 8 cups water
- 1 package envelope of Brown Gravy mix (optional)
- 3 cubes of beef bouillon, or 5 if not using Brown Gravy mix
- 3 tbsp minced garlic
- salt/pepper to taste
- 2 tbsp Extra Virgin Olive Oil (or Canola Oil)
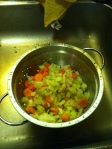 1. Peel the carrots and slice them as you prefer. I cut mine into little discs, so they cook through. Just don’t make them too big, or they will be hard!! Wash your celery and dice that up, and then dice up the onion, and place it all in a colander and wash it up real good. Peel and cube the potatoes and wash them under the sink, then put them aside in a separate bowl.
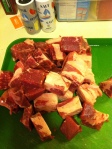 2. Cube your chuck meat. (FOOD SAFETY TIP: Have a separate cutting board that you ONLY use for raw meats.) If you want to stretch your stew into more servings, you can make your chunks smaller than mine, but remember that they do shrink when they cook. I made mine about 2 inches x 1 inch cubed.
 3. In a 6 qt or larger stock pot, heat the oil (I added pepper to mine to season the meat) on Medium/High heat (I set it at 8 on my electric stove).
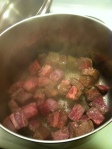 4. Brown your meat on all sides (just keep tossing it around in there and it should be mostly browned in about 10 minutes or so)
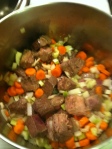 5. Then add your chopped up veggies. Don’t add the potatoes yet. Stir your meat and veggies up and try to coat everything with the oil/pepper. This is the point you can add more spices (parsley, rosemary, etc) if you would like. I just keep it simple, because the beef has so much flavor after slow cooking!!
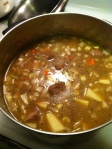 6. Add the water, garlic, bouillon cubes, and Brown Gravy mix (optional) and stir well. Then add your potatoes, being careful not to splash yourself!! Simmer until boiling (still on Medium/High heat setting). Once stew is at a simmer, you can turn down the heat to a low setting. I set my stove at 3 and half cover the pot so it doesn’t boil too much. You just want it to have that slow simmer bubble thing going on.
7. Cook for 1 1/2 hours on Low setting. You can tell the stew is done when the potatoes get soft enough to eat. (Don’t worry about the meat, when you browned it, it was already partially cooked, so after 90 minutes that is definitely done!) Serve with bread and butter or rolls (Jiffy Mix makes great biscuits at an affordable price!!) ENJOY!!
*NOTE: If you are making this stew in your crock pot, you can set it at LOW for 8 hours or HIGH for 6 HOURS and will have the same effect. You don’t really have to worry about overcooking it. The meat just gets more tender!!*
AND, as always, another great FREEZABLE MEAL!! Easy to take for portable lunches in a Thermos, or heat up in the microwave at work.


 I really love to make one-pot meals, not just for the easy cleanup, but the fact that you can make large portions and freeze them for another day. This is a great ‘leave it and forget it’ recipe, but you sure don’t have to leave it for long, as it cooks in only 6 minutes after pressure buildup. A great 30 minute (or less!) meal idea. Since this recipe has so many great flavors, you really don’t need to spend too much on the salsa ingredients, (jarred store brands will do) or, even better, if it’s the growing season, you can use soft tomatoes and peppers that you might find marked down at the grocery or, (even better) in your own backyard garden!
 I decided to post this crumble recipe because it is super versatile and economical. You can use any type of fruit that you happen to have, and the rest of the ingredients are all kitchen staples, so there’s no running to the store to pick up anything else. The recipe itself can be altered if you want a little or alot of crumbles, too!! I always use fruit that I have picked up at the store discounted, or something that I have in my kitchen that is on the verge of turning, so it doesn’t get wasted!!
